Hey everyone!
So this week we are showing off the battle phase of Jacksmith! After you have crafted all your weapons for the day, you and and team of warriors are ready to battle the enemies along the upcoming road. Your warriors will be in the forefront while your weapon wagon slowly rolls along in the back. As your team travels down the road, they will encounter various enemies. They will fight them on their own with the weapons you have made, but your work isn’t done yet.
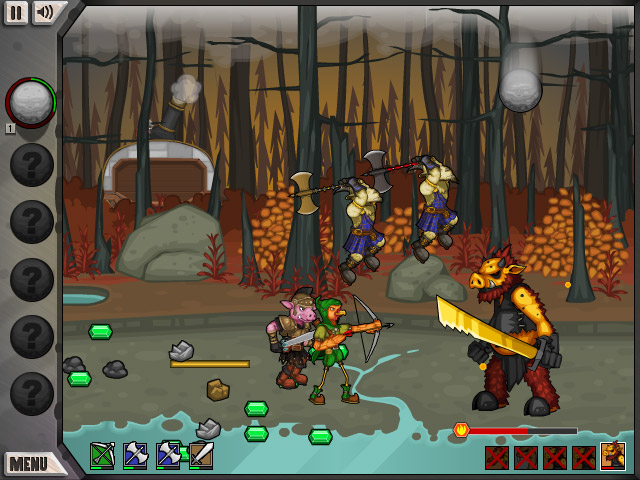
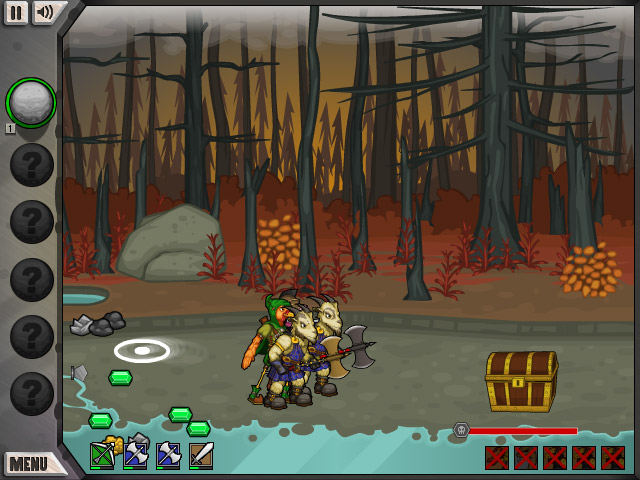
As they fight, the enemies slowly drop various loot such as weapon parts, metal ores, and gems. It is your job to quickly gather all the spoils with the mouse before the warriors run off to the next enemy. As you progress in the game, you will also unlock various cannon balls and bombs that you will strategically launch during the battle to help fight the enemies, and take care of your team. As an added bonus, if you have crafted really good weapons using the most strategic parts, and properly used your cannon, you might make it to the treasure chest at the end of each day. The treasure chest holds a design scroll and the parts needed to make an Epic Weapon, but we’ll talk more about that later.
Hey Everyone!
We have been really busy fine-tuning and play-testing Jacksmith these last few weeks, and things are coming along great!
Last week we went over the first part of sword-making, which was the Casting Process. This week we have details on the second and third parts of making swords in Jacksmith.
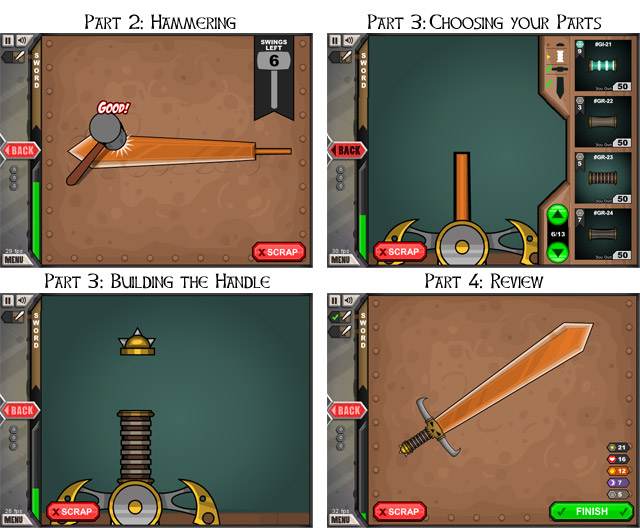
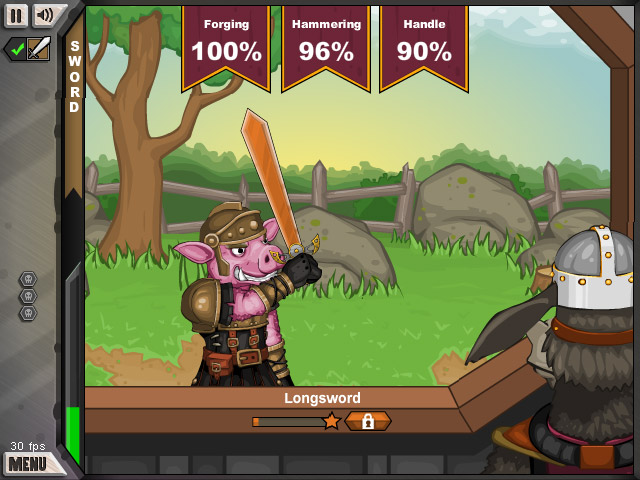
The second part of crafting a sword is hammering. Once the blade is removed from the mold, the sword is ready to be hammered. Hammering sharpens the sword, and a properly sharpened sword results in a higher attack power. To hammer the sword, you repeatedly click around the edge of the blade. Be careful, you only have a certain amount of hammer strikes, so make sure they are well placed.
The third part of sword crafting is building the handle. A properly built handle results in a higher durability during battle. A sword handle has 3 parts: the guard, the grip, and the cap. You design the handle based off of what parts are available in your inventory at the time. Much like stacking a burger in Papa’s Burgeria, you must be careful in assembling the handle, making sure all the parts are properly aligned.
After the sword is built, you can review its stats and send it off to the warrior to be scored. What’s awesome about this process is that there’s an extra layer of strategy to picking your metal ore, mold, and handle parts that we haven’t even explained yet. Also, this is just the process for sword making, the process and steps vary for the other types of weapons you can craft.
Hey Everyone!
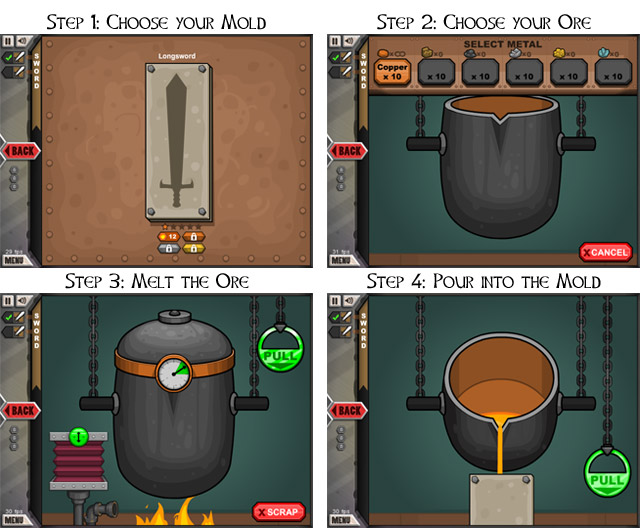
We have more details on Jacksmith’s role as a blacksmith! Fans of Papa’s Gamerias will be glad to know that the weapon making process will be completely hands on in this game. Much like it takes skill to build the perfect taco, it will take skill to build the perfect sword. We will just focus on the first aspect of sword making which is the casting process.
First you will choose a mold of the sword you wish to craft. From there, you will choose the type of metal ore that the sword will be made of. Once you have chosen your ore, it drops into the Cauldron and begins the melting process. Each ore takes a different time to melt, and if you heat it up too long, the metal can degrade and result in a brittle sword. Once the ore is ready to be used you have to carefully pour it into the mold. Pouring too fast can results in spillage and a misshapen sword.
